

Taking Control of AI: Running LLMs on Your Local Machine 🚀💻


Hey there, fellow tech enthusiasts! You've likely heard the constant hum about the latest generative AI tools – ChatGPT, Bard, Claude, and more. These cutting-edge tools all share a common backbone: Large Language Models (LLMs). If you've dabbled in the AI world, you might have seen discussions about installing these LLMs locally. But why go local with LLMs? Let's dive in.
Why Run Your Own LLM Locally? 🤔🛠️
Running your own LLM offers unparalleled freedom and control:
Say Goodbye to Rate Limits: It’s completely free and unrestricted.
Customize to Your Heart's Content: Experiment and tweak settings for personalized use.
Versatility at Your Fingertips: Different models for different tasks? Absolutely.
Be Your Own AI Trainer: Train models tailored to your specific needs.
And if privacy is your priority, running LLMs locally is a game-changer. No more worries about sensitive, confidential, or IP-protected data being exposed in the cloud.
The Easiest Path to Local LLM Installation 🛣️👨💻
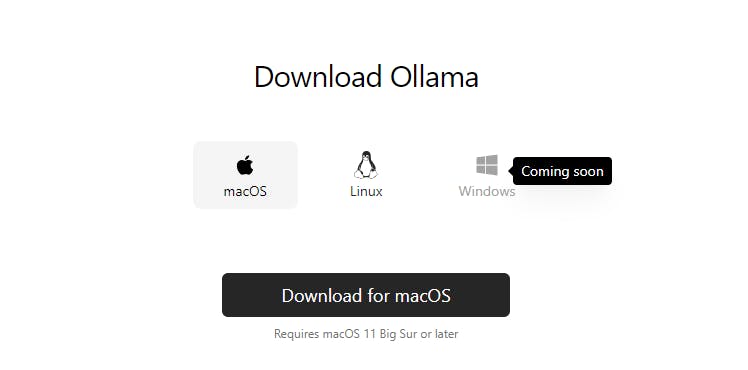
For those of us on Windows, there’s a clever workaround to tap into the power of LLMs. You can use LMStudio, but in this guide we will cover installing Ollama due to it's simplified user experience and accessibility. There is one problem though, Ollama is currently tailored only for Linux and Mac.
But no worries, we're not left behind. The solution? Windows Subsystem for Linux (WSL). With WSL, we can seamlessly run Linux alongside our Windows environment, opening the door to using Ollama right on our Windows machines.
Let's Get Started! 🌟
So, gear up to run a large language model right on your Windows machine. Follow along as I walk you through every step. I am currently running Windows 10, however Windows 11 shouldn't be too different to set up. Here’s to unlocking the power of AI, right from your desktop!
Installing WSL
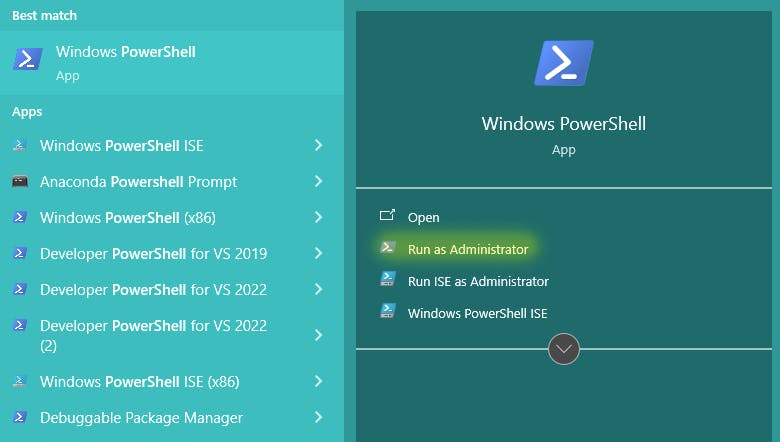
Opening PowerShell as an Administrator 🔑🔵
Search for PowerShell: Click on the search bar in your Windows taskbar and type in “PowerShell”.
Run as Administrator: Right-click on the PowerShell app and select “Run as Administrator”. This step is crucial as installing WSL (Windows Subsystem for Linux) requires administrative privileges.
Enter the Install Command: Simply type
wsl --installand press Enter. This command initiates the installation of WSL on your machine, opening the door to running genuine Linux distributions within Windows.
Note: The installation might take a few minutes, so grab a coffee and let Windows do its magic!
Choosing Your Linux Flavor 🍦🐧
With WSL installed, you now have access to multiple Linux distributions:
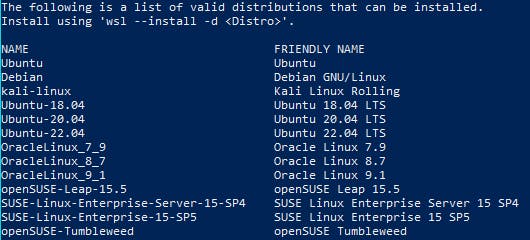
List Available Distributions: To see what Linux flavors you can install, type the following command:
wsl.exe -l -oSelect Your Preferred Distribution: You can choose from popular options like Ubuntu, Debian, or Kali Linux. For the sake of this tutorial, we will be installing Ubuntu 22.04
To do this we input the command:
wsl --install -d Ubuntu-22.04
Creating Your Linux User Account 🔑👤
Once WSL installation completes, it’s time to personalize your new Linux environment:
Username and Password Setup: The system will prompt you to create a username and password. Choose a username that’s easy for you to remember. When it comes to the password, remember: strong and secure is the way to go! This step is just like setting up any new system – straightforward and essential for your security.

Launching Your Linux Distribution 🚀🔍
Now that your account is ready, let’s launch your Linux distribution:
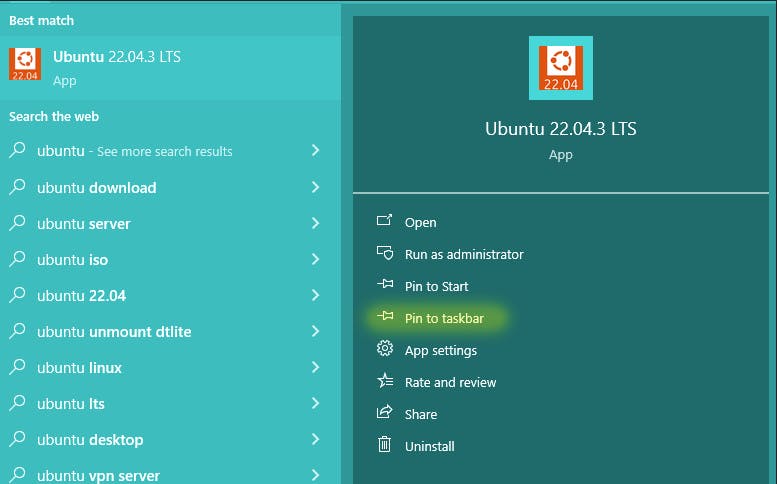
Search and Run: Simply type “Ubuntu” (or the name of the Linux distribution you installed) in your Windows search bar.
Accessing Linux: You can start it right from the search results. For convenience, consider pinning it to your taskbar. If you’re a fan of Windows Terminal, you can also launch it from there.
Congratulations: You're Linux-Ready on Windows! 🎉
With these steps, you now have a fully functional Linux system running alongside your Windows environment. This setup paves the way for installing and experimenting with various software that’s native to Linux, including the Ollama project for LLMs.
Installing Ollama: A Breeze on Your Linux Setup 🌬️💻
The Simplicity of Ollama's Installer 🛠️👌
Installing Ollama on your newly set up Linux environment is surprisingly simple. The developers behind Ollama have crafted an installer that’s not only efficient but also incredibly user-friendly, particularly for Linux and Mac systems. But don't worry, Windows users with WSL are also in luck!
Running the Install Command 📥
Just open your Linux terminal and enter the following command:
curl https://ollama.ai/install.sh | sh
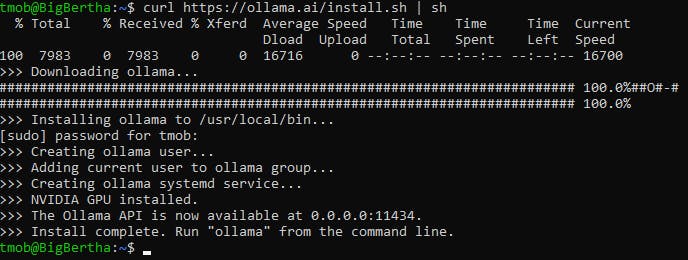
And... You're Done! ✅
That’s really it! With these simple steps, Ollama is now installed on your system. But we’re not quite finished yet.
With Ollama successfully installed, the next step is to select a Large Language Model (LLM) to work with. The great news is, Ollama supports a wide array of models right from the get-go, making this step a breeze. Let’s pick one and dive in.
Starting Up Ollama 🔄
Ollama runs in the background, simplifying your workflow. To ensure it's up and running, you can initiate it with this simple command:
ollama serve
Enter this at the prompt in your Linux terminal. Once done, Ollama is set to automatically start every time you boot up WSL. I have found at this point I would need to open a new terminal.
What's Next? The Adventure Continues... 🌐🔮
But our journey doesn't end here. With your powerful model active, the next thrilling step awaits: setting up a web interface to interact with Ollama. Imagine commanding this coding virtuoso through a sleek, intuitive web portal. Stay tuned, as the next part of our guide unveils how to create this dynamic interface – the journey into advanced AI interaction is about to get even more exciting...
Setting Up a Web Interface for Ollama: Enhancing Your AI Experience 🌐💻
Getting Started with ollama-webui 🚀
Want to add a sleek web interface to your Ollama setup? Thanks to the intuitive ollama-webui, it's straightforward. Let's walk through the steps.
Cloning the Repository 📁🔗
First things first, let's clone the ollama-webui repository:
git clone https://github.com/ollama-webui/ollama-webui.git && cd ollama-webui/
You can place this repository anywhere you prefer in your system.
Installing with NPM 🛠️📦
Next, we'll utilize NPM (Node Package Manager) to install the web interface:
npm install
This process is efficient and should only take a few minutes.
Handling "Unable to Locate Package NPM" Error 🛠️❓
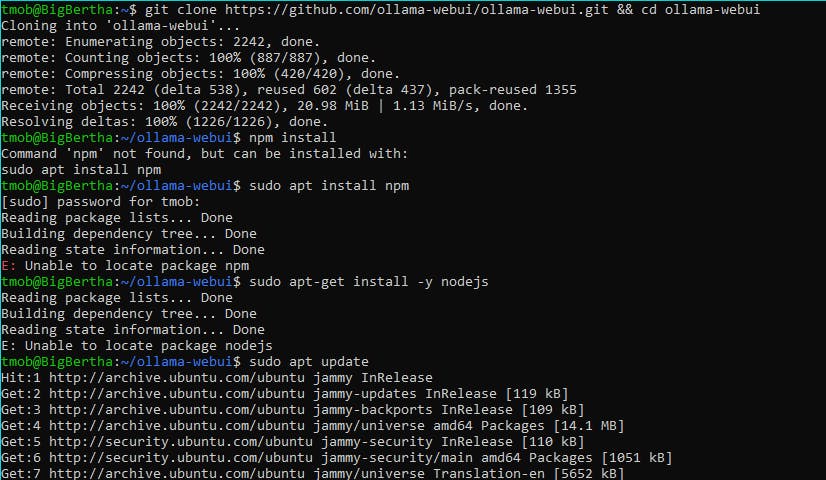
If you bump into the "unable to locate package npm" error, here's how to tackle it. This is a common hiccup, especially on Linux systems that are freshly installed.
Updating Your System 🔄
First, make sure your package lists are updated:
sudo apt update
This command refreshes your system's package list, ensuring it recognizes all the latest software, including NPM.
Installing NPM 📦
After updating, proceed with the NPM installation:
sudo apt-get install npm
Clearing the NPM Cache 🧹
Clearing the cache is crucial for avoiding conflicts and ensuring smooth installations:
npm cache clean --force
Installing 'n' for Node Version Management 🌐🔀
'n' is a handy package for managing Node versions. Install it globally:
npm install -g n
Updating Node to the Latest or LTS Version ⬆️
Now, let's get your Node version up to date:
n lts
n latest
These commands install the Long-Term Support (LTS) and the latest versions of Node, ensuring you have the most stable and recent features.
Removing Old Node Versions 🗑️
Keep your system clean by removing outdated versions:
n prune
This command gets rid of older versions, keeping only the latest installed one.
Setting Up the Environment File 🌍📄
Copy the required .env file for configuration:
cp -RPp example.env .env
Building the Frontend 🏗️🖥️
Finally, install the dependencies and build the frontend:
npm i
npm run dev
And there you have it! You're all set to run ollama-webui with a fully updated and optimized environment.
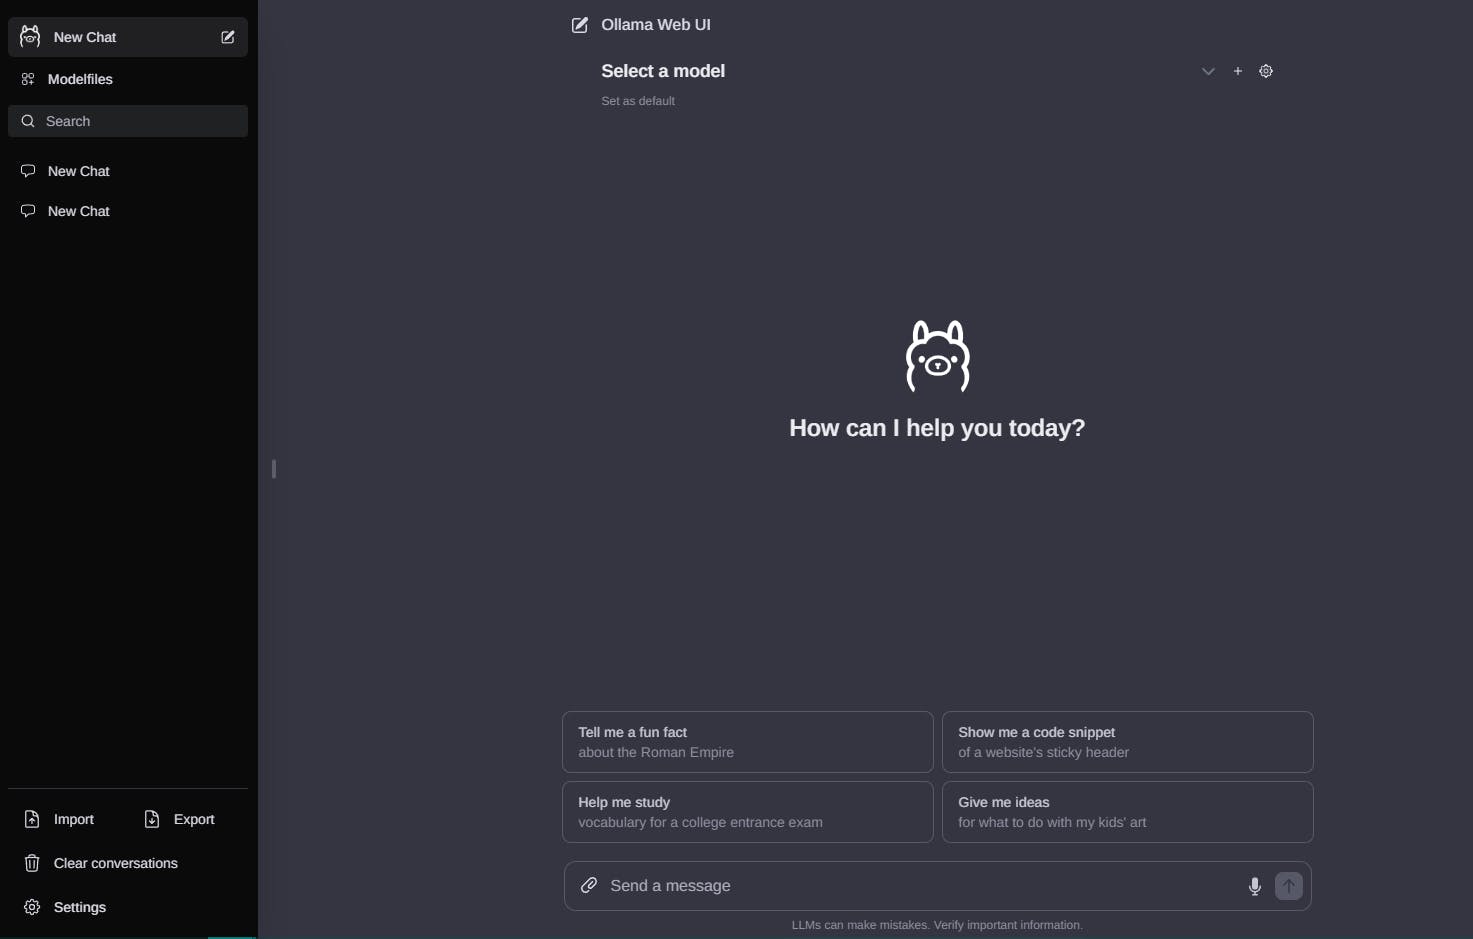
✨ Looks pretty familiar, doesn't it?
Configuring Ollama for the Web Interface ⚙️🖥️
With the configuration set, the next step is to reload the system daemon and restart Ollama. This ensures all changes take effect:
 systemctl daemon-reload
 systemctl restart ollama
These commands refresh the system's understanding of the services and apply the new configuration for Ollama.
Running Your Chosen Model in Ollama 🐬🚀
Now, let's activate Ollama with the model of your choice. In this example, I'm going back to using the neural-chat model:
ollama run neural-chat
This command starts the neural-chat model within Ollama, setting the stage for interaction.
Launching the Web Interface 🌐💻
To interact with Ollama through a more intuitive interface, we'll set up the web server:
Open a Second Terminal: Make sure it's using the same Ubuntu installation where you've set up Ollama.
Navigate to ollama-webui Directory:
cd ollama-webuiStart the Web Server:
npm run devRunning this command initiates the web interface.
Finalizing Your Web Interface Setup ⚙️🌐
Awesome! With the web server up and running, there's just one more step to complete your setup:
Accessing Settings: In the web interface, navigate to the 'Settings' ⚙ icon. This is where you'll fine-tune the connection to your Ollama instance.

Configuring Ollama URL: Make sure to enter your Ollama URL exactly as follows:
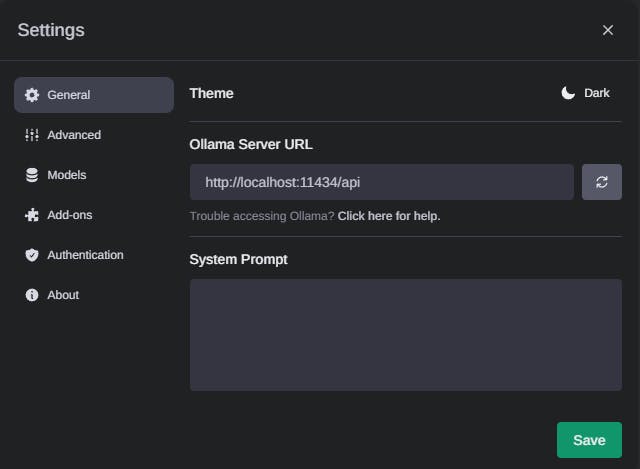
This step is crucial to ensure seamless communication between the web interface and your Ollama model.
And You’re Ready to Go!! 🚀🎉
Congratulations! Your journey to setting up a local LLM with Ollama and its web interface is complete. You're now fully equipped to explore the vast capabilities of AI right from your desktop. Dive in, experiment, and discover the endless possibilities that your new AI setup has to offer!